Photoshop Tutorial : Creating Galaxy Effect
I am going to share a small tutorial to make a galaxy effect using photoshop simple but great filter.
Note : This tutorial is only for people who are aware with Photoshop Basics.
- Create a Black Background on the base layer, choose a pixel size of your wish, I like 1024 x 768 (72 dpi)

- Create a new layer and name it galaxy.
- In tools panel select gradient (radial) : Foreground(white) to Transperant
- Create big circular gradient approximately 200px diameter and then create 80px and 100px diameter circular gradient across the centre in a random fashion.
NOTE : leave some space of around 200 px from the center gradient.

- Continue creating till the canvas (black in color) is crowded.
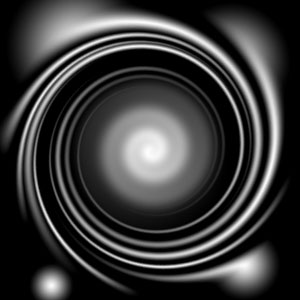
- On the same layer(galaxy), choose Filters>Distort>Twirl and apply it to your imagination of a galaxy feel.
I hope this tutorial adds value to the portfolio of photoshop geeks.
Keep visiting this space for more on Photoshop and Illustrator.
posted by Harjit @ 11:09 AM
0 comments
![]()
![]()

0 Comments:
Post a Comment
<< Home